I decided to take my Sunday and spend some time going through my BJD collection. Quite a few of them had been put in the "Rehome" box, and they have been there for quite awhile. Some of my dolls when I got them, due to being busy with other things and a lack of clear direction, have pretty much been stored safely away waiting for that creative click. (I'm afraid some dolls have been waiting a long time to have me come up with an idea for them!) I've added several more anthros lately. It'll be fun to see just where my doll family is right now. (I'll be dodging a sleeping Mansfield in my lap, so I might not move too quickly!)
Fast forward a few hours later, and all dolls have been sorted. I am keeping everything I had put up for sale. The ones I did part with earlier in the year, I am very glad that I did. I'm also very glad that I did not sell any more. It's nice when things work out that way!
With the lack of creative click, I concluded that for whatever reason, I was trying to achieve too much variety in the styles I dress my dolls in. Not sure why, but there you have it. I favor gothic, whimsy, circus, lolita and Victorian. I should just stick to what I like and not worry about some of my dolls being dressed too similarly! And with that conclusion, I suddenly went on a design kick and have plotted out 3 outfits, and got the first rough pattern draft for Grinsen's clown inspired outfit. (More like the latest IT clown inspired outfit.) Then I got a nice Jester outfit drawn out for Punch, and a Victorian inspired suit for Grim.
I don't think I am going to keep the cyber goth bondage pants I had made for the LTF Juri (at present named Hazard.) I don't really like that style on the little guys. I'll have to think about what to do with him as he has a sort of hot pink and green streaked wig and watermelon colored eyes. (I love those eyes.) And I like the wig a lot. I just have no idea at present what style of clothing would work with the colors.
I don't have names for everyone yet. The above mentioned Hazard might have a name change. My Volks doll is now Grinsen, which is German for grin. (Thought that was appropriate given my fun plans for him.) My Pipos Pang is Grim. My Delf Elf Yder is now settled in as Tenebris. I still don't have a name for my Soom red Trachy. He's a tough one, but I am getting some ideas for his clothing, wig and eyes.
Speaking of wigs, I am short a few. Thankfully I learned from my last wig buying experience not to buy another wig until everything was definitely set. (Those 2 wigs luckily ended up having a use for my soon to be customized MH Frightfully tall Gooliope.) Trachy has no wig. Hazard's wig is up in the air. Lucian (5star Jesse) had a lavender fur wig I was not completely happy with that unfortunately ended up going to the laundry mat. :/ It's a little worse for wear now, and I am not sure if he can even still fit in it. Tenebris stole Coal's (Elf Chiwoo) black and silver wig, and Grinsen has nothing but the ill fated hope that I will make him a yarn wig. So, I got on DoA to see if I could find anything perfect. I know I want Coal's wig to be long, but not too long, and plain black. I found a seller who has one that fits the bill. She has another I think would be perfect for Grinsen. I am eagerly awaiting her response, as I made on offer for the 2. (It's as exciting as getting a new doll! :D)
I'm not sure if I will try to do any sewing today. I might just see how far I can go with designing and just plan on getting some stuff sewn for mine next weekend.

Showing posts with label BJD collecting. BJD Hobby. Show all posts
Showing posts with label BJD collecting. BJD Hobby. Show all posts
Sunday, September 23, 2018

Saturday, August 18, 2018
Progress with the Pumpkin Costumes!
Here's how it is coming along. I think I put in my last post about this project that I had finished the costume for my white mouse, so I won't go over that again. So, this post will be short and sweet! Here's the 2 mice together.

The plum colored pumpkin still needs to be stuffed, and I am seriously debating about re-making the bottom. It just hangs funny, and kind of bugs me. I really want to work on the green one I started 2 weekends ago. So maybe tonight I can do that. Good thing I started this in August, ha ha.
On another happy note, I think I have settled on a name for my white mouse! Rudolph, but he goes by Rudy. Rudy goes with Harold quite well. So, fingers crossing it sticks!

The plum colored pumpkin still needs to be stuffed, and I am seriously debating about re-making the bottom. It just hangs funny, and kind of bugs me. I really want to work on the green one I started 2 weekends ago. So maybe tonight I can do that. Good thing I started this in August, ha ha.
On another happy note, I think I have settled on a name for my white mouse! Rudolph, but he goes by Rudy. Rudy goes with Harold quite well. So, fingers crossing it sticks!
Tuesday, June 21, 2016
Gareth Pugh in BJD form
I thought I'd already blogged this. I guess it fell into the "meant to do long enough it became already done in my mind" category. So, here goes!
I found a WTC post on DoA for a Gareth Pugh outfit. I had seen this outfit before - in fact, it is the same one someone is planning to have made for their recently ordered Ringdoll. She offered me the project for when her doll came in. Sadly, I do not have the right doll size for it at this very moment, and so I feel that it would require too much adjusting to achieve the right fit. (I have plans to right this horrible wrong, though, as I have found a doll I want....) I always get very disappointed when I am unable to sew an outfit that is really inspiring for me, so, when I saw a WTC for that same outfit I was already so in love with, I had to message the person. Then I proceeded to go through the (self inflicted) agony thinking it must have already been snatched up when I didn't hear back from her within a few hours. (Sheesh, self, patience!) In the end, I got the project. (No, no one else got there first. My devastation was overblown as per usual.) The doll this project is intended for is an IoS 70cm with measurements pretty similar to my Dollshe Hound.
I am sewing the tunic part in pleather, with the skirt in gauze. The outfit also includes some black knit tights. Or maybe leggings would be the more appropriate term. I love the affect of the crisp pleather with the soft flowing gauze.
This outfit is just gorgeous. I love the detailed piecing of the bodice, and sleeves. Here is the inspiration pic:

I really enjoyed figuring out the pattern for this. It was sort of like building a puzzle. Here's the outfit on my Hound. (Please forgive the less than perfect pics.)


Ambrose looks just.....amazing in this. I have dreamed for so long about having a Dollshe, and here is my very own Hound. In something I made for him that I love THIS much!!! It just makes me so happy. I'm so proud of this guy. (Yep, he still needs a face up. I just need to decide first on what I want to do with him!)
Work has since commenced on my actual commission piece. The above you see on Ambrose is pretty much my test run, so the outfit my buyer will get will be much more perfect. (I did a quick partial bodice in cotton, and just went onto the pleather. Its one of those outfits that I felt I needed the actual fabric to see how the pattern was coming together. Sometimes this is for fabric weight, sometimes it is just to get the right aesthetic idea, and since cotton is so different than pleather, it didn't work as comfortably for me.) The gauze skirt on her's is much fuller and a little longer, which is definitely an improvement. I'm going to get some more gauze and re-make one for my doll.
The IoS doll I am sewing for has bigger shoulder and chest measurements, which is actually - normally - a very quick adjustment. Somehow I fumbled that one, and made a dumb mistake that I kind of knew at the time was a mistake, but I did it any way. I would have already had it done by now. *face palm* As it stands, I have fixed my mistake, which was simple since I knew darn well what I had done. I should have it completed *hopefully* at the end of the week. So excited to get this to her gorgeous boy! :D
Now that I have seen one outfit designed by Gareth Pugh on my Hound, I think I will pursue recreating some more for my boy on down the road! He has some seriously amazing outfits. I love the post apocolpytic, cyber, vampire, goth sort of look.
I found a WTC post on DoA for a Gareth Pugh outfit. I had seen this outfit before - in fact, it is the same one someone is planning to have made for their recently ordered Ringdoll. She offered me the project for when her doll came in. Sadly, I do not have the right doll size for it at this very moment, and so I feel that it would require too much adjusting to achieve the right fit. (I have plans to right this horrible wrong, though, as I have found a doll I want....) I always get very disappointed when I am unable to sew an outfit that is really inspiring for me, so, when I saw a WTC for that same outfit I was already so in love with, I had to message the person. Then I proceeded to go through the (self inflicted) agony thinking it must have already been snatched up when I didn't hear back from her within a few hours. (Sheesh, self, patience!) In the end, I got the project. (No, no one else got there first. My devastation was overblown as per usual.) The doll this project is intended for is an IoS 70cm with measurements pretty similar to my Dollshe Hound.
I am sewing the tunic part in pleather, with the skirt in gauze. The outfit also includes some black knit tights. Or maybe leggings would be the more appropriate term. I love the affect of the crisp pleather with the soft flowing gauze.
This outfit is just gorgeous. I love the detailed piecing of the bodice, and sleeves. Here is the inspiration pic:

I really enjoyed figuring out the pattern for this. It was sort of like building a puzzle. Here's the outfit on my Hound. (Please forgive the less than perfect pics.)


Ambrose looks just.....amazing in this. I have dreamed for so long about having a Dollshe, and here is my very own Hound. In something I made for him that I love THIS much!!! It just makes me so happy. I'm so proud of this guy. (Yep, he still needs a face up. I just need to decide first on what I want to do with him!)
Work has since commenced on my actual commission piece. The above you see on Ambrose is pretty much my test run, so the outfit my buyer will get will be much more perfect. (I did a quick partial bodice in cotton, and just went onto the pleather. Its one of those outfits that I felt I needed the actual fabric to see how the pattern was coming together. Sometimes this is for fabric weight, sometimes it is just to get the right aesthetic idea, and since cotton is so different than pleather, it didn't work as comfortably for me.) The gauze skirt on her's is much fuller and a little longer, which is definitely an improvement. I'm going to get some more gauze and re-make one for my doll.
The IoS doll I am sewing for has bigger shoulder and chest measurements, which is actually - normally - a very quick adjustment. Somehow I fumbled that one, and made a dumb mistake that I kind of knew at the time was a mistake, but I did it any way. I would have already had it done by now. *face palm* As it stands, I have fixed my mistake, which was simple since I knew darn well what I had done. I should have it completed *hopefully* at the end of the week. So excited to get this to her gorgeous boy! :D
Now that I have seen one outfit designed by Gareth Pugh on my Hound, I think I will pursue recreating some more for my boy on down the road! He has some seriously amazing outfits. I love the post apocolpytic, cyber, vampire, goth sort of look.
Sunday, June 12, 2016
Asylum Chic and Halloween Industrial...for the mice??? *Picture heavy*
Yep! For the Cheese mice. :) Instead of working on the Dark Mori outfit I intend to make for my Hound for the Project Journal Round on DoA (my plans, my plans, I never stick to them) I got my critters out yesterday, wanting to come up with some sort of idea that I like, will continue to like, and that will give them each a defined style and presence. I have tried different things for them - more like have come up with different plans for them, but nothing really has ever stuck. Yesterday after doing some sketching that went nowhere, an idea clicked in my head.
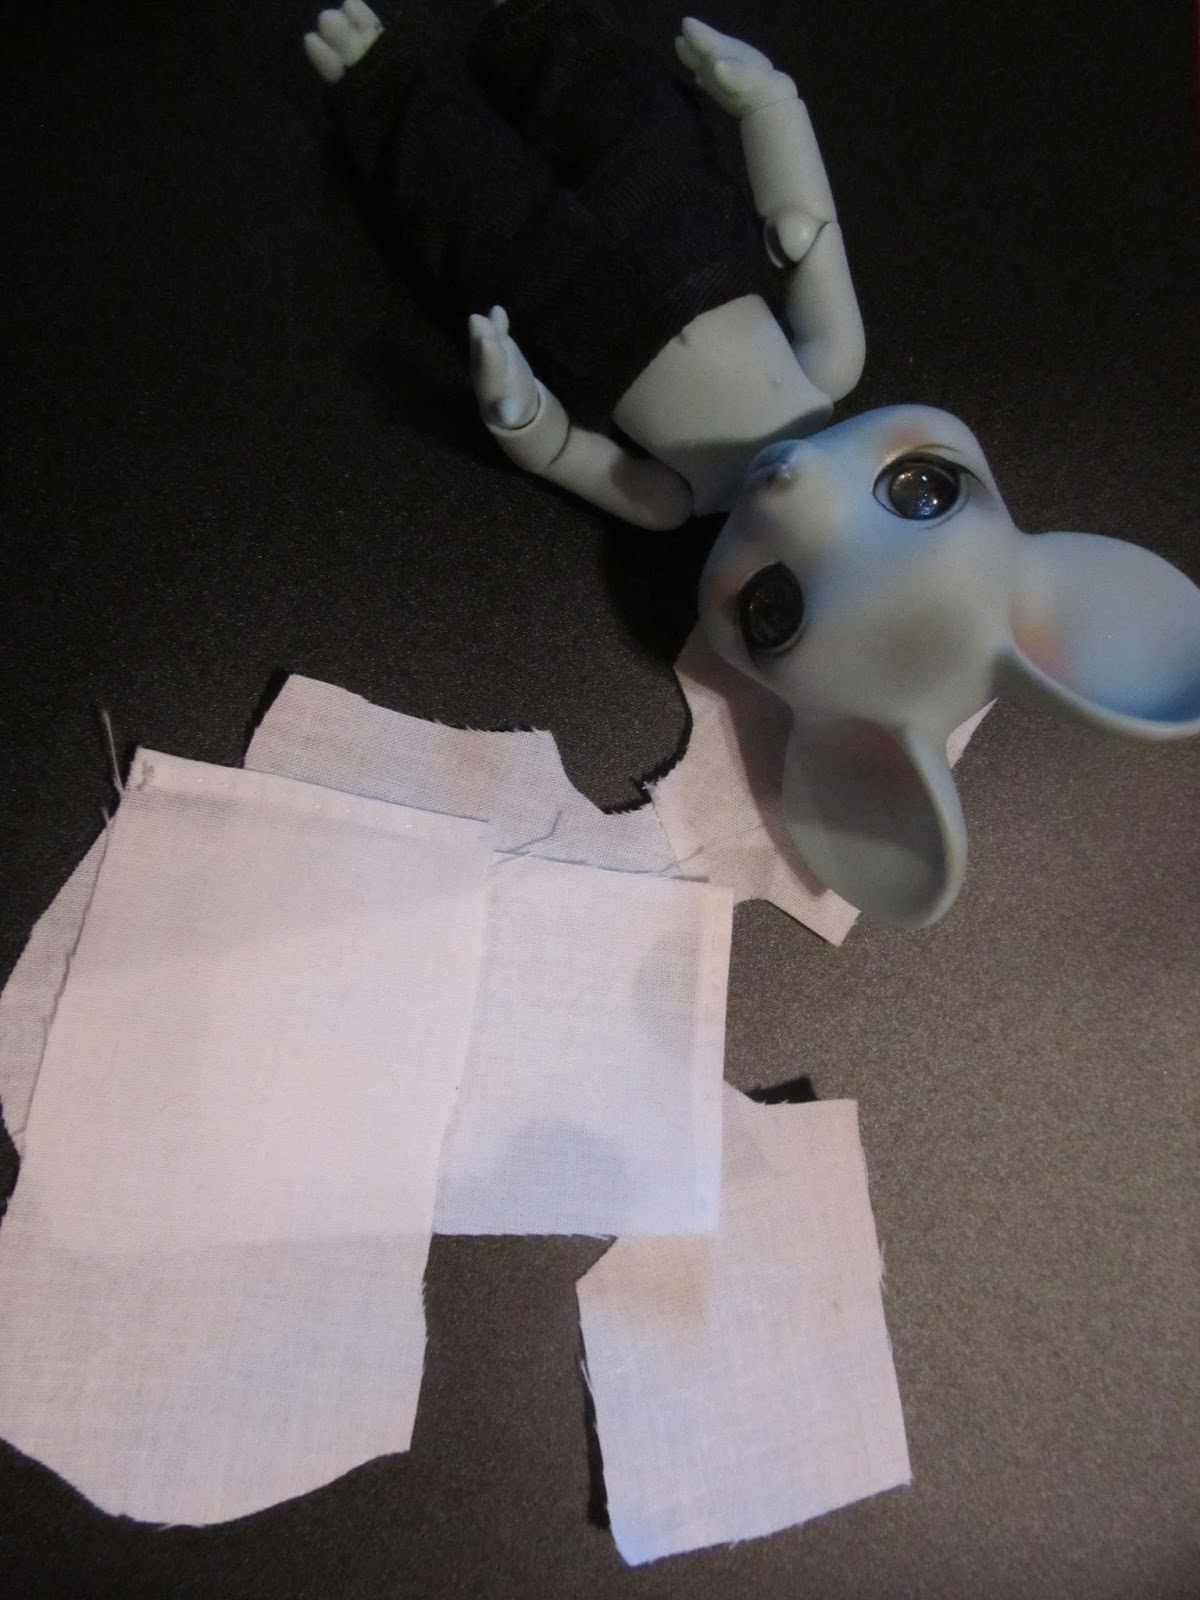
I decided to start with Blueberry. I had already made some simple little black twill pants back several months ago. So for this guy, all he needed to have was a shirt. I decided to try and make the mummy, asylum chic style of shirt (no, this isn't original) similar to one I started making for SD size (and consequently, have never finished in the last couple of year - yikes.) I thought it would be pretty simple, and while it was, I had no idea it would take me as long as it did. O.o
Basic pieces in white cotton. I sewed the shoulder seams together before I should have.

Next step, the tiny little strips. There were 18 on one sleeve, 17 on the other.


And now the front and one back. As you see, I did take the shoulder seams apart in order to better sew on the strips.

And just a cute pic of Blueberry holding his finished sleeves in excitement...(Lovely background, eh?)

4 hours later, it is finished. My regret is not taking the time to fray check the strips before sewing them on. I love the shredded effect, which got more shredded in my struggle to turn those loooong sleeves inside out. (It wouldn't have hurt to have made them a wee bit wider for that reason.) I luckily only managed to pull off one strip which is some sort of miracle. I was having visions of having to toss out the whole thing at that point while I tried - as gently as I could - to pull those sleeves through. What a relief when I finally did!) I had put a slit in either sleeve so he could get his paws through to use his hands, which not only looks cool, but helped greatly in the turning-the-sleeves-inside-out drama.


I decided to start with Blueberry. I had already made some simple little black twill pants back several months ago. So for this guy, all he needed to have was a shirt. I decided to try and make the mummy, asylum chic style of shirt (no, this isn't original) similar to one I started making for SD size (and consequently, have never finished in the last couple of year - yikes.) I thought it would be pretty simple, and while it was, I had no idea it would take me as long as it did. O.o
Basic pieces in white cotton. I sewed the shoulder seams together before I should have.
Next step, the tiny little strips. There were 18 on one sleeve, 17 on the other.

I tried to figure out a way to make more blind stitches, but do to the size, and the fraying tendency of the fabric, I just took small running stitches. At first I was disappointed, but the more rows I did, the more I decided it was perfect, and added to the effect. Below is the finished right sleeve.

And now the front and one back. As you see, I did take the shoulder seams apart in order to better sew on the strips.

And just a cute pic of Blueberry holding his finished sleeves in excitement...(Lovely background, eh?)

4 hours later, it is finished. My regret is not taking the time to fray check the strips before sewing them on. I love the shredded effect, which got more shredded in my struggle to turn those loooong sleeves inside out. (It wouldn't have hurt to have made them a wee bit wider for that reason.) I luckily only managed to pull off one strip which is some sort of miracle. I was having visions of having to toss out the whole thing at that point while I tried - as gently as I could - to pull those sleeves through. What a relief when I finally did!) I had put a slit in either sleeve so he could get his paws through to use his hands, which not only looks cool, but helped greatly in the turning-the-sleeves-inside-out drama.


It will have a chain sewn onto the shirt, and also the pants. I *know* I have one around here somewhere, but I have no idea where it is. I really don't think I used it for something else, unless it was Ambrose' bondage pants....I'll just have to get another one. And then it will be perfect! :D
I do intend to try and go in there with a tooth pick or something to maybe add some fray check to it. I'll update later if I did, what I did, and if it worked. Even if I don't, it is technically fine. I'll just handle it with care.
And here he is with his twin, Grape Jelly. I'll do a separate post for his outfit, as I have WIP and the story to tell for that one too. :)

Monday, March 28, 2016
Glitter Eyes for Cheese Mice....
My difficulties in finding appropriate eyes for my Pipos Cheese Mice has been going on for years. Since they cannot have eyes with stems, finding anything that suits me is really, really hard. Pipos does put random eyes with their dolls, and its a crap shoot if I actually like them or not. I seem to land with mostly pink spectrum eyes, and it doesn't really work with most of my dolls. Harold (my beige basic mouse, and first of them crew) came with these gorgeous cobalt blue eyes. I loved them. Unfortunately, I lost his eyes when I was cleaning out a bunch of my stuff. They didn't end up in the keep or sell pile, and ended up in the trash. I deeply regret that. I would have never thrown them away on purpose. This was probably 3 or 4 years ago, and trying to find anything that I like for him or any of them for that matter has been mostly a bomb out.
A couple of years ago I bought 3 or 4 pairs of eyes from someone who was selling them on the DoA MP. One pair was a glass stem less pupil-less gold glitter. I love them. They have gone from mouse to mouse to see who gets to keep them while the others fear they will never have anything actually decent for them.
A few weeks ago, my sweet friend sent me some blank 18mm DIY eyes, which was so nice and totally unexpected! I got 3 pair, which was perfect at the time, as I only had 4 mice, and only 3 of them still needed eyes. (I got another mouse shortly thereafter.) I love glitter eyes, and since you can use nail polish as well as paint, stickers, etc, I decided to use some nail polish.
I got some blue glitter polish for this project. I thought it would be the perfect color for Harold. I decided to go with white glitter for the second pair, and silver for the final pair. I compensated the polish with some of my micro glitter. Once I had them how I wanted them, I pushed the clear dome - or at least I attempted to. Now, this could totally be on the operator here, but I could only get the silver ones to actually go down and snap into place. The white ones I got partially put into place, but the blue ones? I have had to keep putting one back into the eye as it has randomly come off. Seems like Harold's bad luck continues. The color I went with didn't end up being as dark as I had thought it would be. It's like every time I try and fix my original mistake of losing Harold's eyes it's like "foiled again!"
As it turned out, Harold isn't even wearing them right now. I had planned also on the white glitter eyes being for my white cheese mouse Coconut Cream, the silver glitter being for Blueberry, and Grape Jelly keeping the gold glass. Right now, Harold is wearing the white, Coconut Cream the silver, Grape Jelly the blue, and Blueberry the gold. I don't have pics of them yet in their new eyes, but this is how the eyes look. I do really like them. :)

Now I just have to figure out what to do for my peach mouse, Peach Cobbler....
A couple of years ago I bought 3 or 4 pairs of eyes from someone who was selling them on the DoA MP. One pair was a glass stem less pupil-less gold glitter. I love them. They have gone from mouse to mouse to see who gets to keep them while the others fear they will never have anything actually decent for them.
A few weeks ago, my sweet friend sent me some blank 18mm DIY eyes, which was so nice and totally unexpected! I got 3 pair, which was perfect at the time, as I only had 4 mice, and only 3 of them still needed eyes. (I got another mouse shortly thereafter.) I love glitter eyes, and since you can use nail polish as well as paint, stickers, etc, I decided to use some nail polish.
I got some blue glitter polish for this project. I thought it would be the perfect color for Harold. I decided to go with white glitter for the second pair, and silver for the final pair. I compensated the polish with some of my micro glitter. Once I had them how I wanted them, I pushed the clear dome - or at least I attempted to. Now, this could totally be on the operator here, but I could only get the silver ones to actually go down and snap into place. The white ones I got partially put into place, but the blue ones? I have had to keep putting one back into the eye as it has randomly come off. Seems like Harold's bad luck continues. The color I went with didn't end up being as dark as I had thought it would be. It's like every time I try and fix my original mistake of losing Harold's eyes it's like "foiled again!"
As it turned out, Harold isn't even wearing them right now. I had planned also on the white glitter eyes being for my white cheese mouse Coconut Cream, the silver glitter being for Blueberry, and Grape Jelly keeping the gold glass. Right now, Harold is wearing the white, Coconut Cream the silver, Grape Jelly the blue, and Blueberry the gold. I don't have pics of them yet in their new eyes, but this is how the eyes look. I do really like them. :)

Now I just have to figure out what to do for my peach mouse, Peach Cobbler....
Sunday, March 6, 2016
MSD Boy Lolita Project
This is a project for one of my own dolls. I had this crazy idea to put girl's Lolita clothes on a boy (I don't like any of the girl BJDs) but I love, love Lolita clothes. So, I bought myself a RS WS Song to dress accordingly. (I am definitely not the only BJD owner to do this. :P) I picked out 2 pieces of fabric for him - one is a turquoise heart print, and the other is a pale minty/sage print. My first idea of an outfit for him is a much simpler dress than some I would love to make. I have the basic dress mostly done, but I still need to add some ribbon and fabric bows to it. Here's how it is looking so far.


If you look closely, you will see his missing finger. Talk about a moment of pure horror. I have NO idea how this managed to happened. I do know that RS has infamously thin resin (thus their cheap price) so it had to be a weakness in the resin. I am very careful with my dolls. I don't slam them around, I don't let them crash, so to have a broken finger is pretty upsetting. It must have snapped off when I was putting the dress either on him or off of him. I couldn't find the broken off finger at first. :/ I finally found it the third time of looking for it. It was under my desk. I can fix this when I get some epoxy. But still. He's broken and I am really unhappy. Poor doll.
I still need to get his wig. I can't quite decide what I want to do. I am hoping that the pink mohair wig I found on DoA is still available. I think it really fits him. I love mohair wigs. I have never owned one myself, but I really love the look of them. Roosevelt has some cute kitty white Mary Jane shoes I got for him, and also another pair he ended up with by default. The measurements of the shoes were incorrect in the listing, so they do not work for my Doll Leaves Royal, but thankfully they work fr Rosie. (This caused the expected tensions between the 2 dolls. It's not Rosie's fault, but what does D'arcy care?) I also need to either make or find him some stockings. My pair of blue and white stripe stockings that are a little too dark for this turquoise dress, but they will have to do for now.
I'm all set to make his bloomers and petticoat. I was going to start on them last night, but after his finger broke, it kind of killed the sewing mood for me....


If you look closely, you will see his missing finger. Talk about a moment of pure horror. I have NO idea how this managed to happened. I do know that RS has infamously thin resin (thus their cheap price) so it had to be a weakness in the resin. I am very careful with my dolls. I don't slam them around, I don't let them crash, so to have a broken finger is pretty upsetting. It must have snapped off when I was putting the dress either on him or off of him. I couldn't find the broken off finger at first. :/ I finally found it the third time of looking for it. It was under my desk. I can fix this when I get some epoxy. But still. He's broken and I am really unhappy. Poor doll.
I still need to get his wig. I can't quite decide what I want to do. I am hoping that the pink mohair wig I found on DoA is still available. I think it really fits him. I love mohair wigs. I have never owned one myself, but I really love the look of them. Roosevelt has some cute kitty white Mary Jane shoes I got for him, and also another pair he ended up with by default. The measurements of the shoes were incorrect in the listing, so they do not work for my Doll Leaves Royal, but thankfully they work fr Rosie. (This caused the expected tensions between the 2 dolls. It's not Rosie's fault, but what does D'arcy care?) I also need to either make or find him some stockings. My pair of blue and white stripe stockings that are a little too dark for this turquoise dress, but they will have to do for now.
I'm all set to make his bloomers and petticoat. I was going to start on them last night, but after his finger broke, it kind of killed the sewing mood for me....
Saturday, January 9, 2016
Princess Project - Girl #3 Finished! Pic heavy
Third girl is complete! I spent all afternoon sewing up the backs and sewing snaps on all the remaining pieces. I'm so excited!
These dresses are for the Lady Ophelia. She is the most practical of the 3, so I went for more lines for her's in the designs to go with her more serious nature. Her color theme is browns and creams. I believe her dresses ended up being my favorites of the 3, although Annmarie's blue Sunday Best vies for that place as well.
First up, we have her Summer Dress. This one is a mix of cream silk and a lovely brown linen. There is ribbon detailing around the square neckline, the front and back of the over skirt, as well as the sleeves.


These dresses are for the Lady Ophelia. She is the most practical of the 3, so I went for more lines for her's in the designs to go with her more serious nature. Her color theme is browns and creams. I believe her dresses ended up being my favorites of the 3, although Annmarie's blue Sunday Best vies for that place as well.
First up, we have her Summer Dress. This one is a mix of cream silk and a lovely brown linen. There is ribbon detailing around the square neckline, the front and back of the over skirt, as well as the sleeves.


Up next is her glorious Sunday Best. The brown silk was hand dyed. The sleeves alone on this dress took me a couple of hours to make, and oh was it worth it! I love this dress very much. :D The belt is made of some pretty gold and white trim.


And last but never least is her Ball Gown. I love this one too! The silk is all hand dyed. There is a lot of bead work on the shoulders, and down the front of this dress. The underskirt is has machine sewn stripes down front.


All done! I'm going to take it to the PO on Monday to get it weighed. I can't wait to get it all boxed up! I have everything neatly bagged up, ready to be packaged. :)
Friday, January 8, 2016
Princess Project - Girl #2 finished!!! PIC HEAVY
Following the world's most frustrating photo shoot, I have gotten pics of the completed Crown Princess's wardrobe. These belong to AnnMarie - the elegant dreamer, who has a love for embroidery. In designing her dresses, I wanted to include one dress that featured embroidery, and go with an airy more fairy tale look. Her colors were pastel blues and mints/greens.
For some reason, while taking these pics, my doll would NOT stand. I think he might be protesting the many hours he has spent playing princess while helping me with this project. I owe him big time, lol, but he needs to hold out just a little longer! In reality, I need to restring him. He is the kickiest, falling-est little guy. I have to carefully adjust his legs under the dress to get him to stand, and in adjusting the dresses I would either knock him over, or he would just crumple. For that reason, I don't think these pics turned out quite as good as my last ones, but hopefully, they still show the dresses off well.
Okay, enough complaining, lol! On to the pics!
This girl being the crown princess, needed a crown. I sculpted it out of polymer clay, then painted it. I will seal it before I send it. She wears it with a wimple, which was made out of cotton due to the necessity of providing the right hang. Silk would have been pretty, but too stiff. The veil is a panel lace.


First off, the one I am the most proud of I think out of all the dresses, Annmarie's Sunday Best. This one has the embroidery in 2 places. I went with several different colors for the flowers - a very white blue, a purple, and then for a pop of color, a deep red.
I initially had designed the sleeves to be sewn onto the dress like some of my other ones, but once I started drafting the pattern, I realized it would hide too much of the dress, so I changed it to these detached sleeves that snap close. This dress has a lovely 3 layers that have an elegant train in the back. The dress silk is hand dyed, the corset was a store bought silk.


For some reason, while taking these pics, my doll would NOT stand. I think he might be protesting the many hours he has spent playing princess while helping me with this project. I owe him big time, lol, but he needs to hold out just a little longer! In reality, I need to restring him. He is the kickiest, falling-est little guy. I have to carefully adjust his legs under the dress to get him to stand, and in adjusting the dresses I would either knock him over, or he would just crumple. For that reason, I don't think these pics turned out quite as good as my last ones, but hopefully, they still show the dresses off well.
Okay, enough complaining, lol! On to the pics!
This girl being the crown princess, needed a crown. I sculpted it out of polymer clay, then painted it. I will seal it before I send it. She wears it with a wimple, which was made out of cotton due to the necessity of providing the right hang. Silk would have been pretty, but too stiff. The veil is a panel lace.


First off, the one I am the most proud of I think out of all the dresses, Annmarie's Sunday Best. This one has the embroidery in 2 places. I went with several different colors for the flowers - a very white blue, a purple, and then for a pop of color, a deep red.
I initially had designed the sleeves to be sewn onto the dress like some of my other ones, but once I started drafting the pattern, I realized it would hide too much of the dress, so I changed it to these detached sleeves that snap close. This dress has a lovely 3 layers that have an elegant train in the back. The dress silk is hand dyed, the corset was a store bought silk.


Next up, we have her Summer Dress. This one is made out of a mint chiffon. I sewed some white trim on the bottom of the skirt which matches the belt, which is attached to the dress in the front.


Last, but never least, is her beautiful Ball Gown. The silks were both hand dyed. The underskirt is in a spearmint, the over dress is a mix of spearmint and pistachio. I love the shade! I cut out pieces of lace to sew on the front center of the skirt and the bodice. Onto that, I sewed some dark mint colored seed beads. These also line the bottom edge of the underskirt. The sides and back of the skirt feature little puffs created by tiny pin tucks. I don't think I captured it very well....


And that finishes up girl #2! Next up, girl number 3!
Tuesday, January 5, 2016
Princess Project Update - Girl #1 is finished!! PIC HEAVY
I am so excited to have one third of this completely done sans snaps for the backs. These 3 dresses are for Marianna, a Zuzu Delf Bichon Iron Fan LE. She is the younger princess, much more playful, and would rather be outside playing with her animal friends. My designs were really influenced by this as it has to fit her character. Her dresses are simpler than her sister's for this reason. Her favorite colors are pink, so we went with that for her theme. I did venture out a bit with the ball gown, opting for white and almost an orchid color for a little more variety. Her head dress I just finished today. I just did the final photo shoot for her beautiful dresses before I get them packed up to go to their rightful owner.
First off, the head dress. It is made out of silk and decorated with a lovely ribbon. I was lucky to have already found this in my stash after organizing a couple of weekends ago. I needed something that tied in with all of her dresses. This works perfect!


This is her ball gown. It has quite a few beads. The orchid silk is hand dyed. I had fun mixing my dyes to come up with this gorgeous color.


The final one is her Summer dress. Silk is hand dyed as well.


I will be updated this blog with the other 2 girls finished clothing as soon as I get them photographed. :)
First off, the head dress. It is made out of silk and decorated with a lovely ribbon. I was lucky to have already found this in my stash after organizing a couple of weekends ago. I needed something that tied in with all of her dresses. This works perfect!

This next one is her Sunday Best. The silk is hand dyed. It has some little pearly white beads at the neck line.


This is her ball gown. It has quite a few beads. The orchid silk is hand dyed. I had fun mixing my dyes to come up with this gorgeous color.


The final one is her Summer dress. Silk is hand dyed as well.


I will be updated this blog with the other 2 girls finished clothing as soon as I get them photographed. :)
Subscribe to:
Posts (Atom)